# VuePress-plugin-Mailchimp
Simplifies subscribing new email addresses to a Mailchimp email list.
# Install
First of all, you have to sign up for Mailchimp.
yarn add vuepress-plugin-mailchimp -D
# OR npm install vuepress-plugin-mailchimp -D
# Usage
Take a look at Using a Plugin.
// .vuepress/config.js
module.exports = {
  plugins: [
    "vuepress-plugin-mailchimp",
    {
      // You need to provide this plugin with your Mailchimp endpoint in order for it
      // to know where to save the email address. See more detail in Config section.
      endpoint: ""
    }
  ]
};
# <SimpleNewsletter/>
This plugin provides a out-of-box component. Since it has been registered automatically, you can simply use it in your .md or .vue files.
- Source code:SimpleNewsletter.vue
- Usage:
// .md file

...
your content
...

<SimpleNewsletter/>
or
// .vue file

<template>
  <SimpleNewsletter />
</template>
# Config
# endpoint
- Type:
string - Required: true
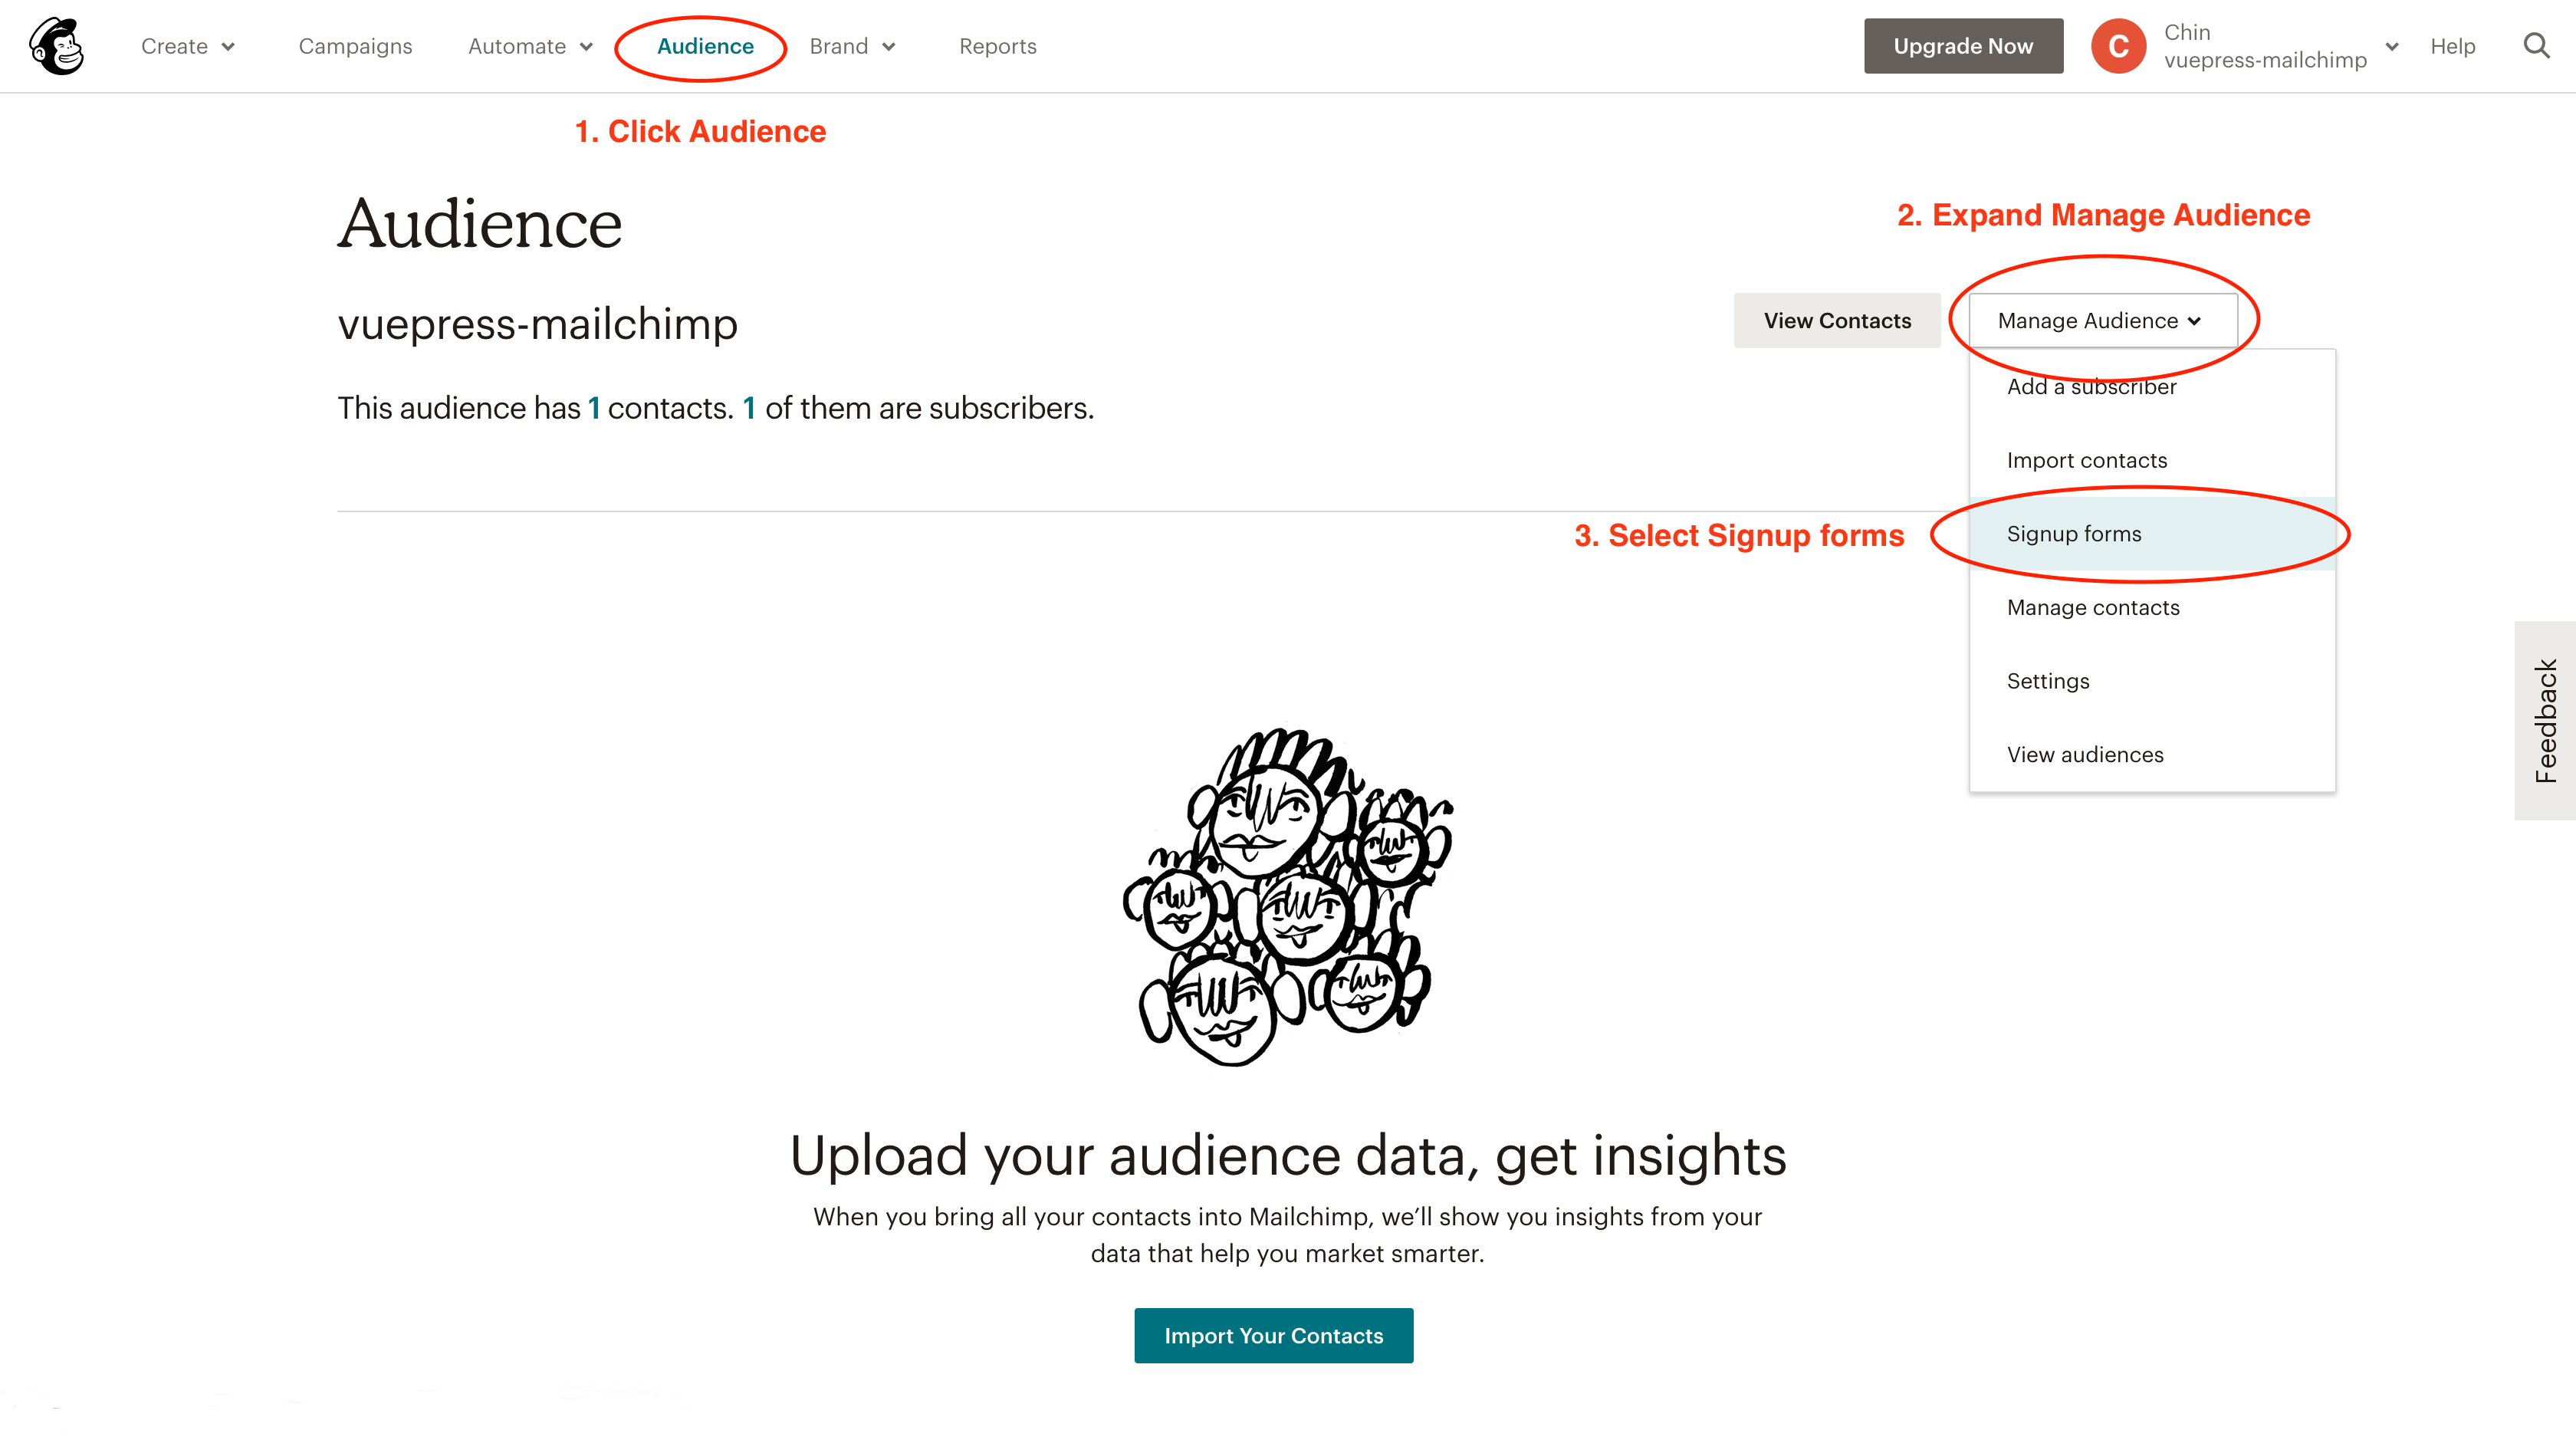
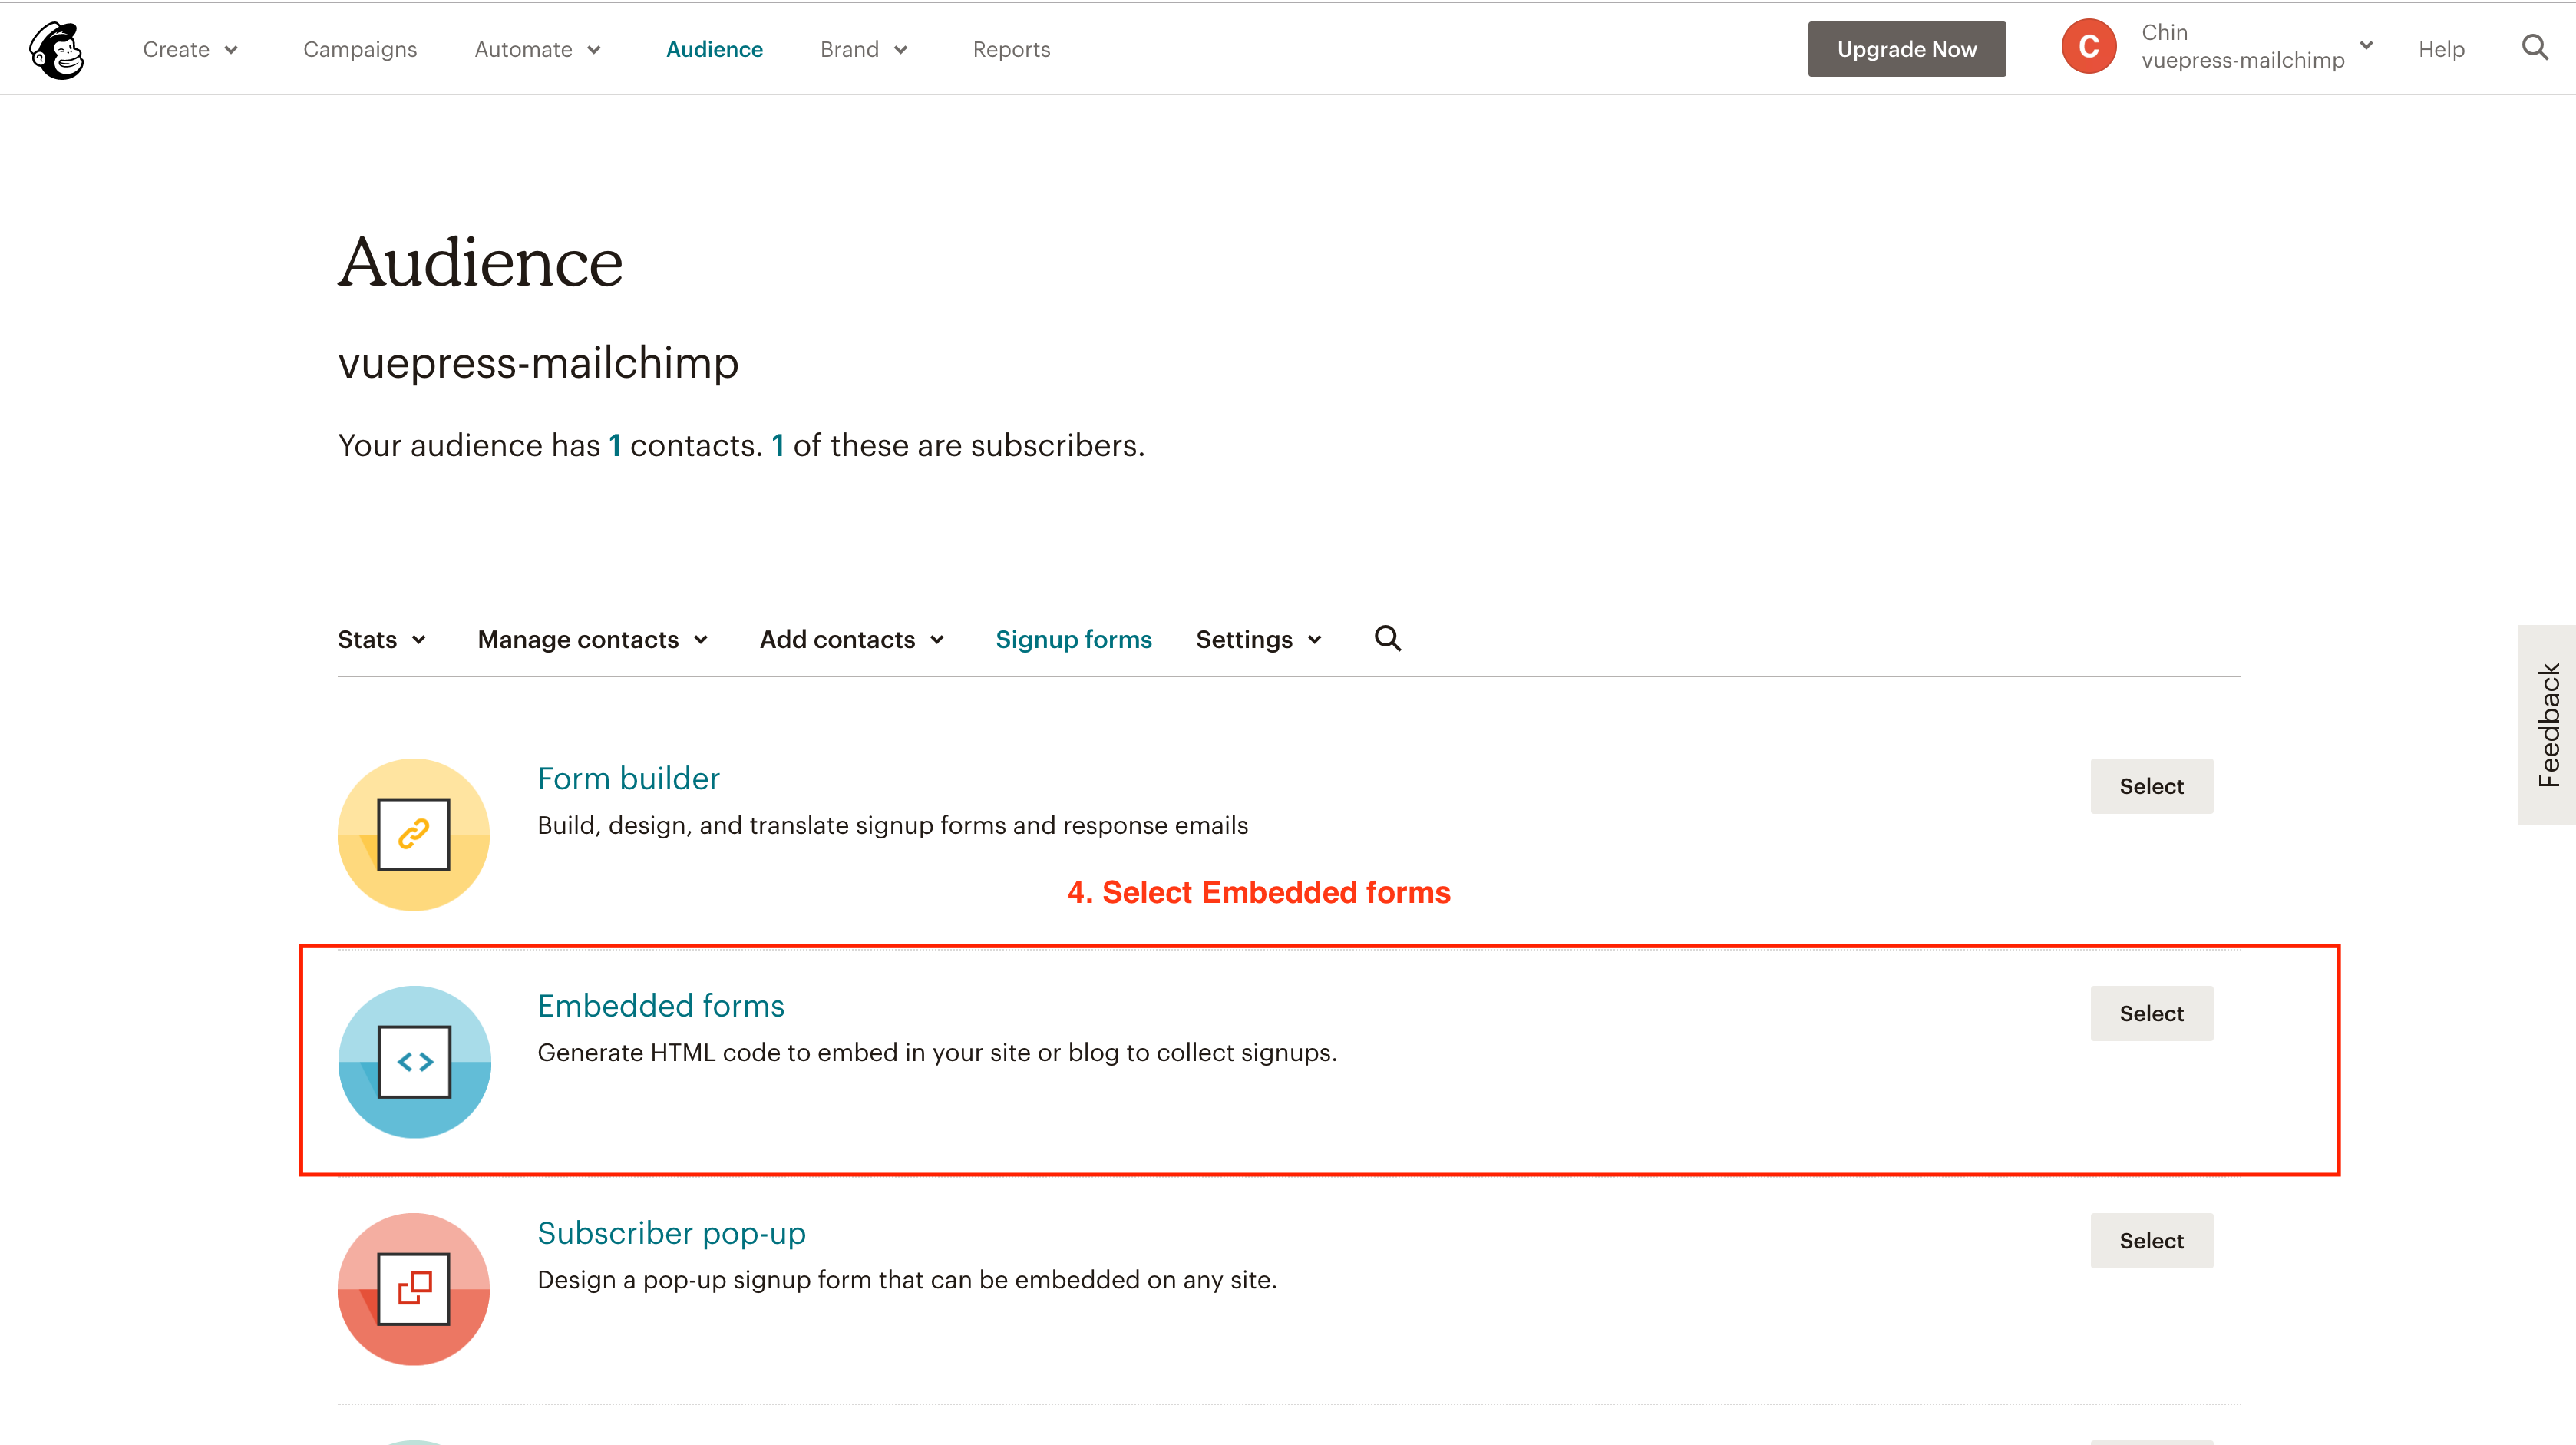
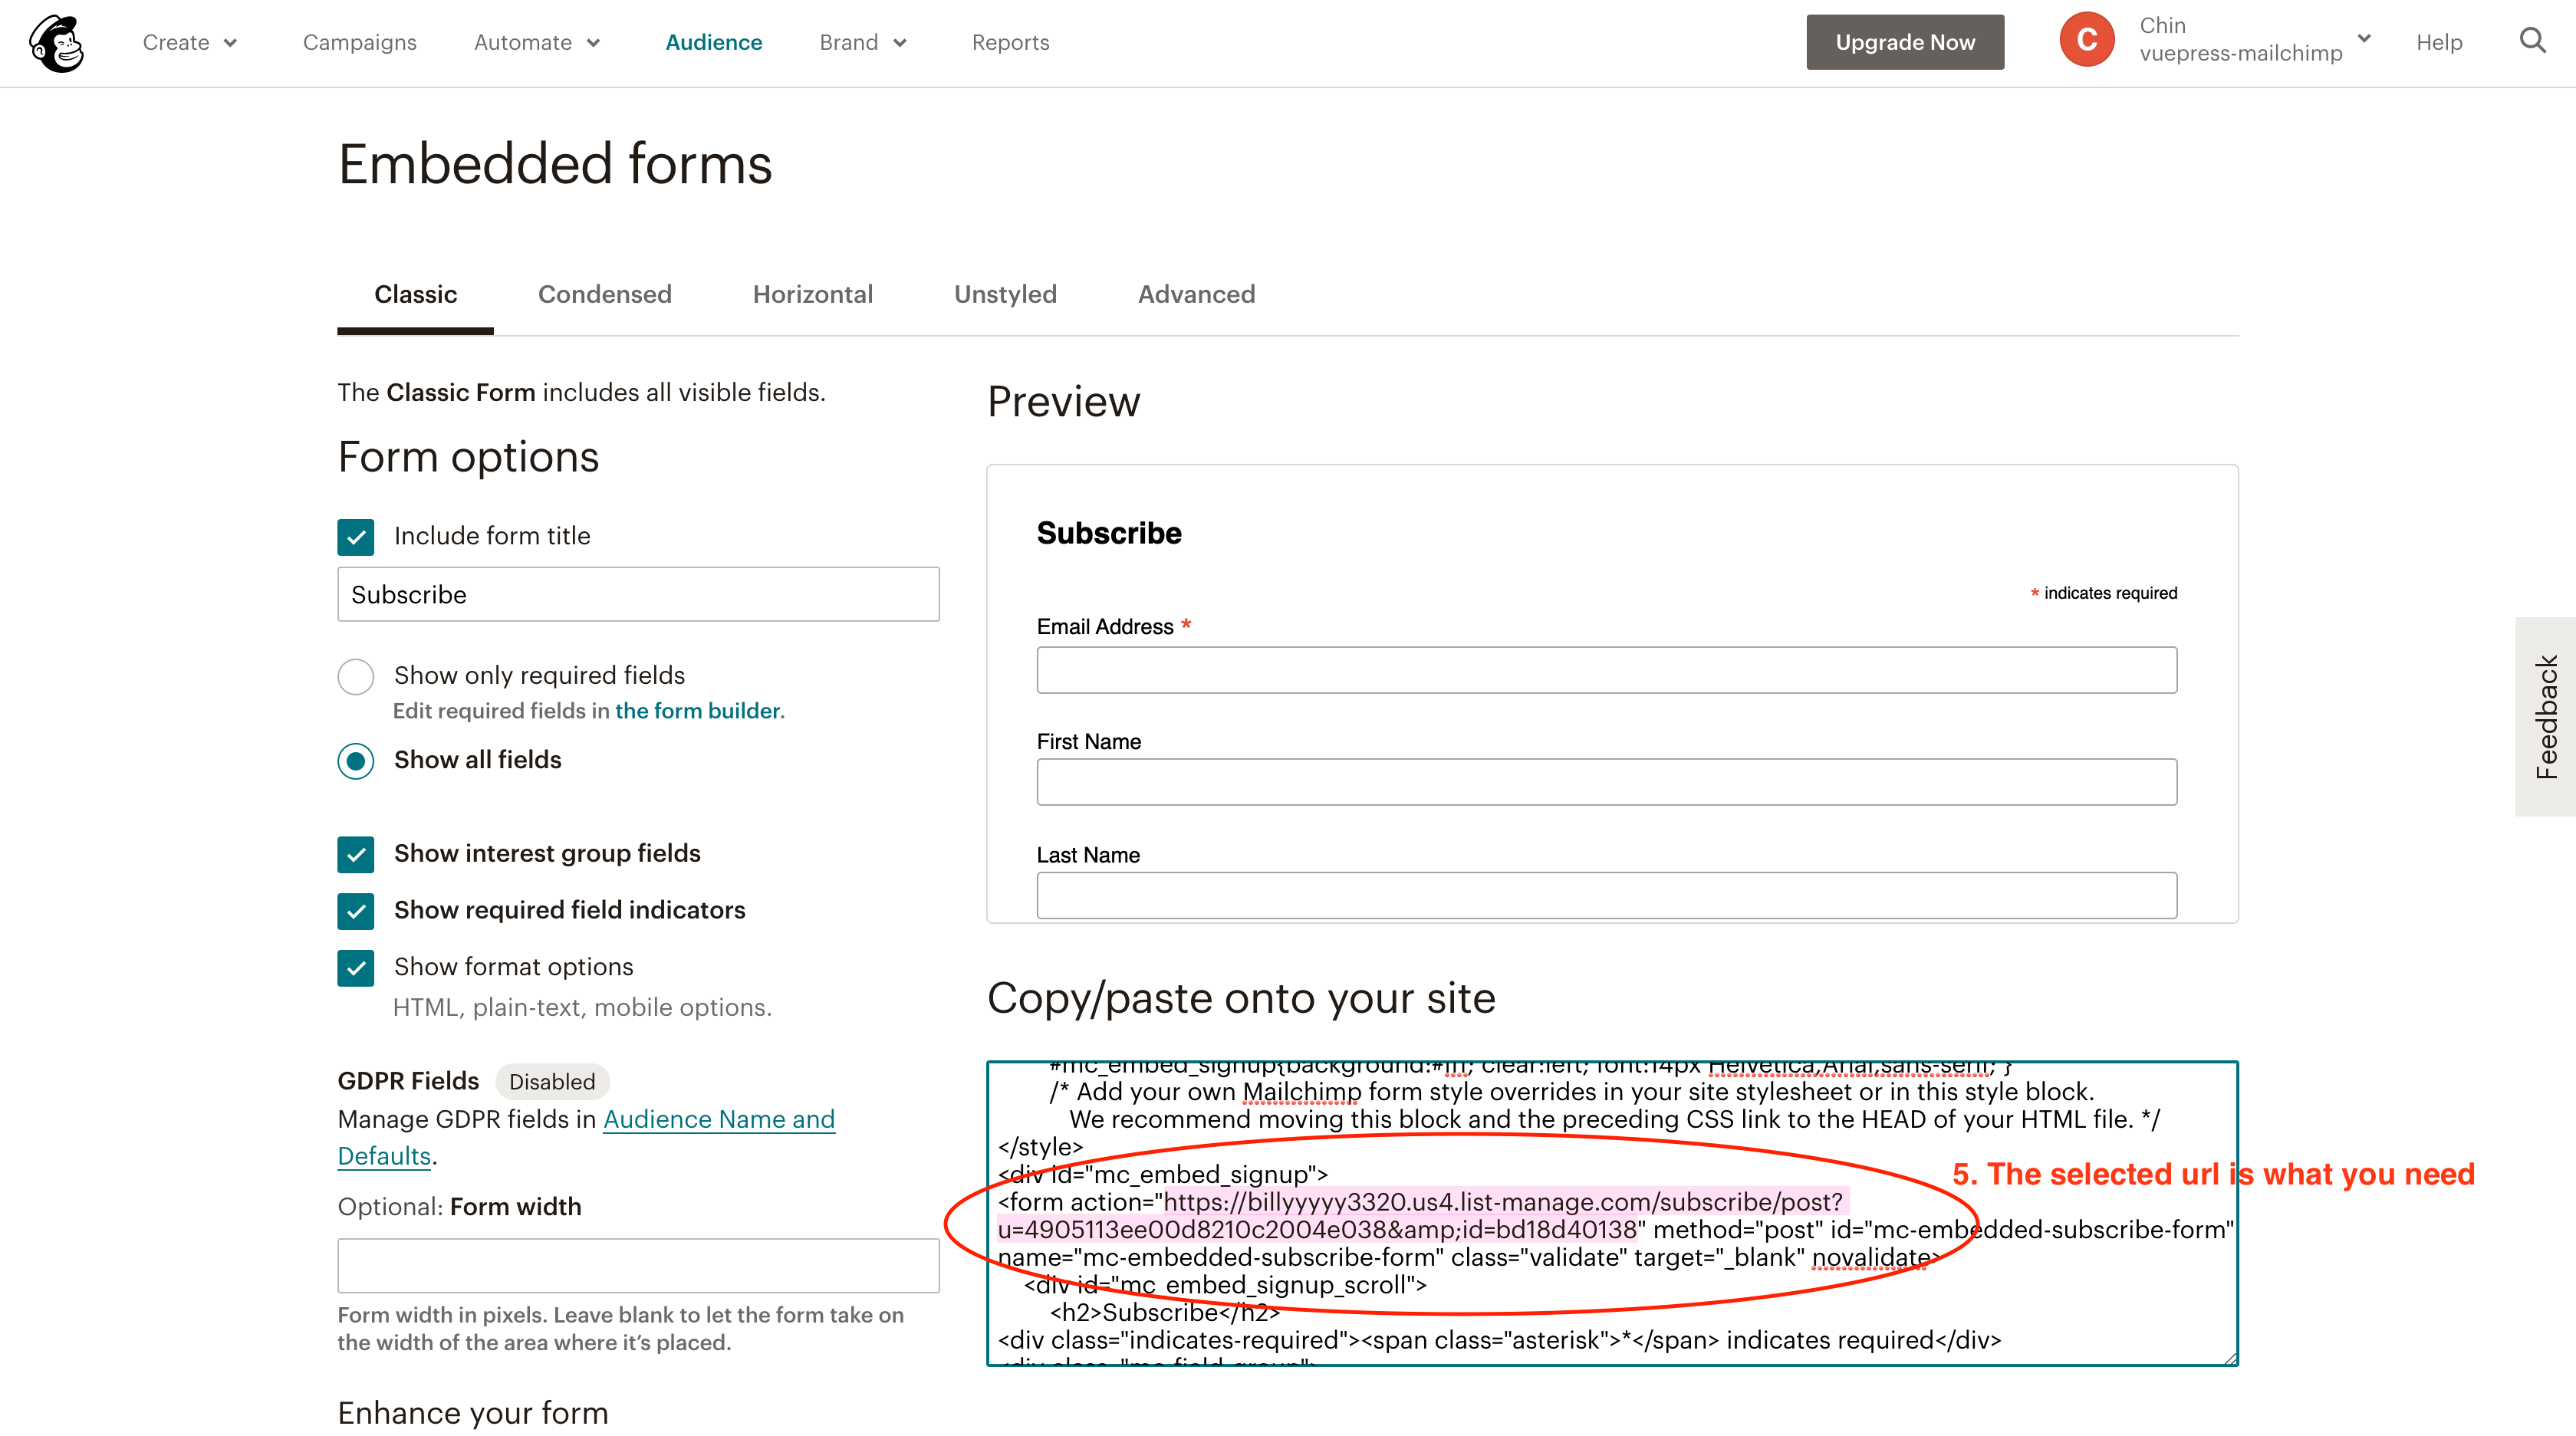
How to get your endpoint:


# title
- Type:
string - Required: false
- Default:
'NewSletter'
To be rendered as newsletter's title in <SimpleNewsletter/>
# content
- Type:
string - Required: false
- Default:
'Subscribe to get my lastest content. No spam.'
To be rendered as newsletter's content in <SimpleNewsletter/>
# submitText
- Type:
string - Required: false
- Default:
'Subscribe to get my lastest content. No spam.'
To be rendered as newsletter's submit text in <SimpleNewsletter/>
# popupConfig
- Type:
object - Required: false
- Default: See below
# enabled
- Type:
boolean - Default: true
Showing the popup after subscribing. You can stop showing the popup by setting to false.
# popupComponent
- Type:
string - Default:
Popup
A custom component to replace the default popup component.
Also see:
# timeout
- Type:
number - Default: 3000
# UI Customization
# NewSletter
The out-of-box component provides a default slot which gives you the ability to fully control the appearance.
First, you need to create a global component (e.g. MyNewsletter) at .vuepress/components. There're some properties inside slot props to simplifies your customization:
title: The title you've set in configcontentThe content you've set in configmail: No matter how you customize, you still need an email input. Please make sure binding this prop to the field.
e.g.
<template>
  <SimpleNewsletter v-slot="{ slotProps }">
    <div class="my-title">{{ slotProps.title }}</div>
    <div class="my-content">{{ slotProps.content }}</div>
    <input
      class="my-input"
      type="email"
      name="email"
      aria-label="Email"
      placeholder="Email"
      v-model="slotProps.mail"
      required
      autocapitalize="off"
      autocorrect="off"
      data-cy="email"
    />
    <button type="submit" class="my-button" data-cy="submit">
      {{ slotProps.submitText }}
    </button>
  </SimpleNewsletter>
</template>

<script>
/* ... */
</script>

<style>
/* ... */
</style>
WARNING
A submit button is required.
# Popup
The popup component also provides a default slot and slot props:
enabled: Whether the user have made subscription or not. It's probably the time for rendering.message: Default isThank you for subscribing!orRequest failed!.isError: You'll need it if you'd like to have different ui when the subscribing is failed.
e.g.
<template>
  <Popup v-slot="{ enabled, message, isError }">
    <div v-if="enabled" class="my-submit-popup" :class="{ error: isError }">
      <h1>UI Customization</h1>
      {{ message }}
    </div>
  </Popup>
</template>

<script>
/* ... */
</script>

<style>
/* ... */
</style>
# More
This plugin use JSONP for cross domain request saving your from CORS issue. The method is exported from mailchimpSubscribe.js which accepts a required argument (email) and a optional fields. If you don't like the out-of-box component and the two approaches to customization can't meet your need, you might want to use this method to build your own component.
e.g.
<template>
  <div>
    <input type="email" v-model="mail" placeholder="email" />
    <input type="text" v-model="name" placeholder="name" />
    <button @click="onClick">Click me!</button>
  </div>
</template>

<script>
import subscribeToMailchimp from "vuepress-plugin-mailchimp/src/mailchimpSubscribe";
export default {
  data() {
    return {
      mail: "",
      name: ""
    };
  },
  methods: {
    onClick() {
      subscribeToMailchimp(this.mail, { LNAME: name }).then(res => {
        alert("Well done!");
      });
    }
  }
};
</script>